Introduction To Underwater Photography – How to Choose Your Equipment
(part 1 of 3)
Hello, my photographer friend!
This Intro is meant for complete beginners, regardless of age and prior diving experience.
What you need in order to follow the instructions herewithin is good health, an inquisitive mind, and some previous knowledge of photography.
So let me introduce you to Snorkeling as an entry point to Underwater Photography.
It opens another World, which also happens to be the largest part of our Planet's surface. As you know, water is a bloodstream of our Earth, and getting to know as much as one can about it presents an exquisite adventure into "inner space". It is worthy of an attempt, especially to us photographers, because we have the means to appreciate and share those endless beauties which surround us throughout our lives.
The best thing about it, this kind of photography has nowadays become accessible to everybody, anywhere there's some water!
To reach this fascinating submerged World, we need to acquire:
- a proper frame of mind,
- a waterproof camera,
- a diving mask, snorkel, and a pair of fins.
It does not look like much, but that's the beauty of it! So let's start with the most important:
Proper Frame Of Mind
You should be aware that entering water in order to photograph always presents some risks. It is of absolute importance that you are reasonably good swimmer, meaning that you can be sure to reach the safety of dry land should you ever feel something is out of the ordinary.
That's how the usual snorkeling courses begin... but fortunately, in many cases the usage of basic snorkeling equipment has been known to turn average swimmers into better ones. The basic equipment can in many cases make your swimming a lot safer, since you float without effort, you're able to see and breathe with your face under the surface, and because the fins make you use your swimming energy more efficiently.
You should know how to lie on the surface, and how to avoid any sort of anguish and panic, as these are by far the greatest dangers in the water. You should be able to control your breathing and the urge to cough. Coughing is reflex action of your body trying to expel droplets which irritate your breathing system, and our watery environment is, well, full of droplets!
We will discuss the usage of basic snorkeling equipment in more detail in the next part of this intro.
Waterproof Camera
In this text I'll be using "waterproof" as it is very different from "water-resistant". This difference is significant, although the terms tend to be used as synonymous by people who do not give it much thought.
WaterPROOF means sealed against water ingress, resistant to chemical effects (corrosion), and impervious to pressure deformations, both in freshwater and saltwater.
Water-RESISTANT usually covers all the aspects mentioned - except the pressure. This determines the placement and type of sealing applied to such devices. More precisely, the water-resistant devices can stand having water splashed on them, but mustn't be put under the water surface, as the pressure difference may cause water to enter your device. Waterproof devices will be constructed and sealed against this pressure, so as to enable you to use these to device-specific rated working depths.
Some types of sealing are guaranteed to keep water from entering the device within certain length of time, while the other types of sealing work with no time limit. Thus, prior to buying, one should carefully read the technical specifications so as to keep within the limits set by the manufacturer.
All models of environmentally sealed cameras mainly fall in two major categories. The first groups normal cameras encased in watertight casings. Since you are already a photog, you might consider investing in such a casing, so as to be able to use the camera you are already familiar with.
This might be expensive, sometimes costing even more than the camera itself, so it might point you toward an investment in one among the cameras from the other category: those amphibious cameras, or self-contained point & shoot waterproof models. But generally, amphibious cameras usually withstand less pressure than the camera housings, which are standardly built for depths of 40 to 60 meters (5 – 7 Bar pressures).
At this point it might be interesting to also look up the ever more popular action cameras, which are tiny, very capable wide-angle video & photo devices in very strong casings. These are reliable, easy to use, and you might find them excellent for this purpose. Also, there are ever better Chinese-made copies... which are a lot cheaper, too! Some among those cams also record a lot of extra data, so it can't hurt to look them up!
The downside of all action cams might be their inherently extreme wide angle lens, which limits you to the pre-set optical characteristics.
There is a wide choice of amphibious cameras, and many times they are cheaper than some dedicated casing. They are not so bulky, are simpler to use, and also easier to carry and mantain. Current models are built to operate from 3 to 30 meters below the surface. These specs will surely change with time and new models appearing, so there are no foreseeable limits. As I see it, the deeper the cameras can go, the sturdier they are. As it is, those that can safely be taken to 15 meters depth (2.5 Bar pressure) will be more than sufficient for most of the apnea (breath-holding) dives. See the latest waterproof models from Canon, Fujifilm, Nikon, Ricoh/Pentax, Olympus, and many others. Read all you can find about them, and not only the ad part! The camera specifications will point you to the model for your needs.
Consider the camera's maximum depth rating, as you might probably progress toward deeper dives, but those models that can reach 10 to 15 meters of depth will be okay for a long time. Then check the optical camera specs and features, bearing in mind that you will not need any strong zoom or fancy program modes. Those will be of more use on dry land. Most of the time and in shallow waters you'll use Daylight WB, and your shooting distances will rarely extend over three meters. Any corrections are better applied in post-processing your images on large screen, so the in-camera post-processing tools are not overly important. If you like traveling photography, consider those models with integrated GPS module, altitude- and depth-meters. You might want to have such data. Keep in mind that GPS does not receive signal while submerged.
Read all you can find about any model which you find interesting for your photography. Have some reservation while reading reports and reviews from people who used such cameras for the first time. These will be more emotionally loaded than factually ballanced, and so less representative. As always, the camera specs are your best data source for the kind of work you have in mind.
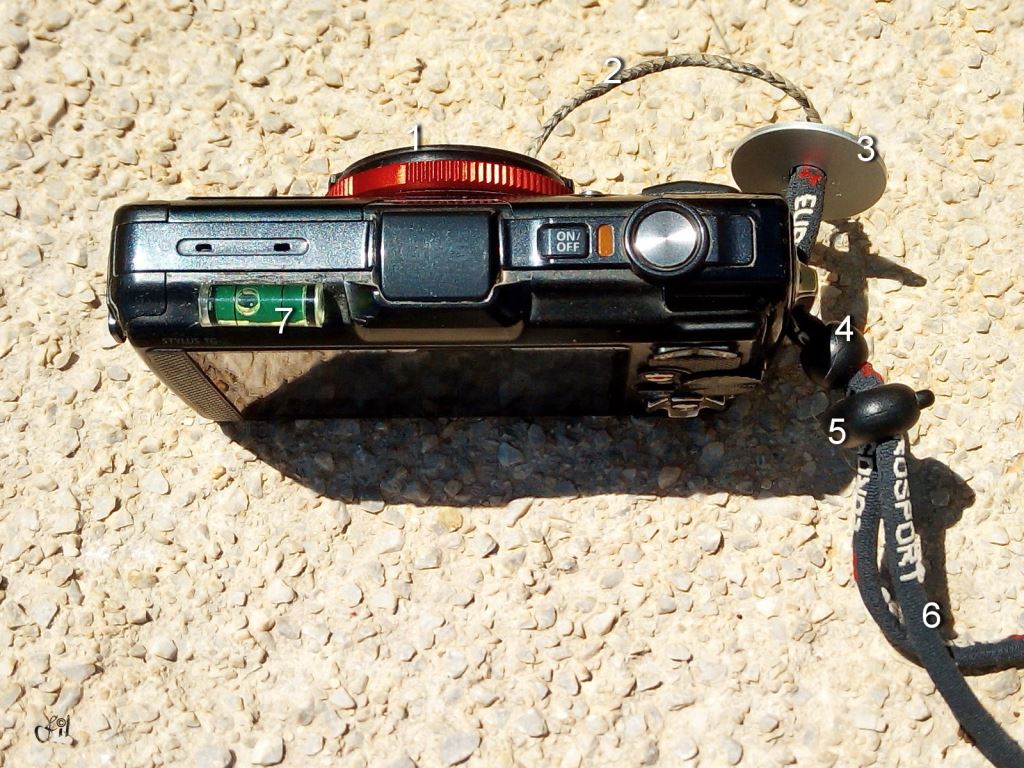
The camera you want to use for your underwater shots should feel well in your hand, so try and handle it in the store first, instead of buying it straight off the net. Also, use Internet to gather all available info upon the model of your choice.
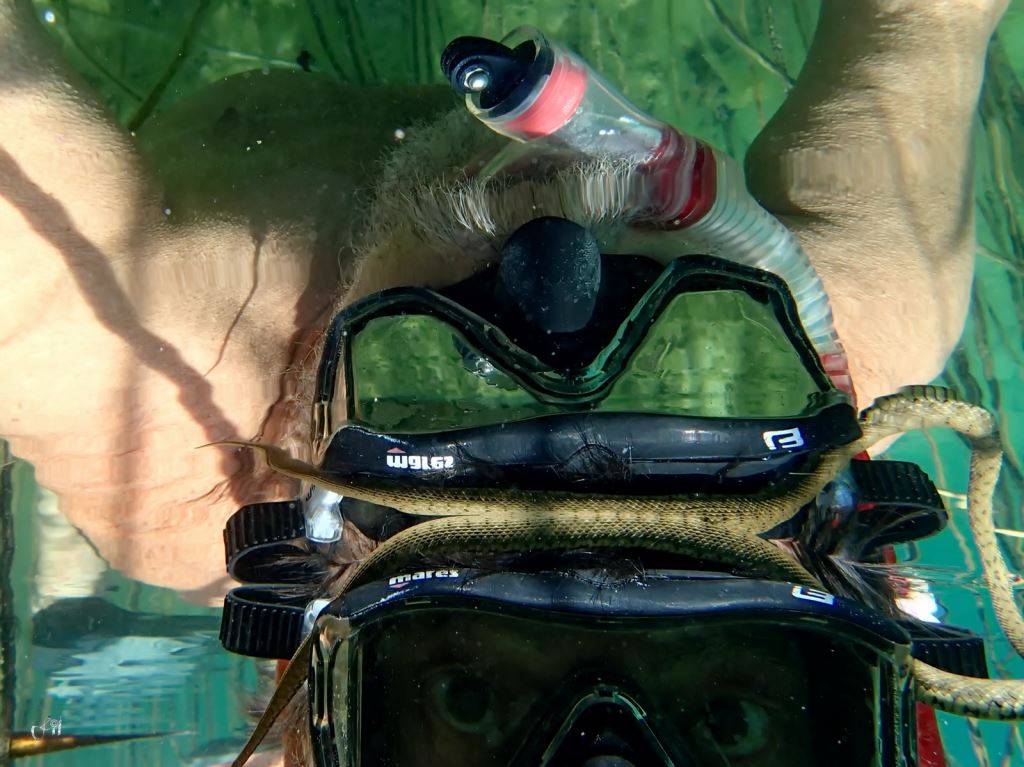
Diving Mask
Again, there are overwhelmingly many models to pick among, so use the simple rules listed here.
NOTE: Swimming goggles MUST NEVER be used for diving! As a rule of thumb, goggle-enclosed eyes should never be exposed to a depth over 0.5 meters. Diving with swimming goggles can seriously harm your eyes! All masks made for diving must have the wearer's nose within their sealed volume, for purposes of pressure equalizing. This is explained in the third part of this text.
Masks should have minimal volume and the widest possible field of view. The spearhunting-type mask models usually have those features. After all, photo-theme hunting is pretty similar to spearfishing, only the photographers will have more chance to get what they are after, and nothing gets killed in the process!
Good models to consider are built along the lines of MARES Essence, X-Vu, or i-3. Look them up to see what I mean. These models are built with good concept and new material called LiquidSkin, a silicone compound of varying resilience which adapts to many facial configurations. The i-3 like models have two side ports which greatly widen the field of view, adding a bit to the volume. There are many more good manufacturers, of course. I mention MARES as one among the best, but be encouraged to search among all the masks you can find, as long as these are made to follow the first two characteristics: minimal volume and maximal FOV.
NOTE: Avoid clear (translucent) mask body. Such masks, though great for underwater models because of face lighting, will have some internal reflections. As the light enters from the sides, it will reflect the face from the inner glass surface, thus reducing the contrast. Pick a non-translucent mask body (matte black is best). It will keep your eyes in the shade and you'll see better. Whether your mask has a single of double viewport is of no importance for viewing, but double-port models have smaller volume, which is important both in the field of view and also in mask clearing (this is discussed later).
Avoid unnecessary add-ons, like purge vents or compensation bubbles. These just present more parts to malfunction. All the mask operations and functions can be achieved without them – as has been done for decades before. In water, simplicity is an absolute key to safe operations, and many a non-essential feature is actually only there to hopefully raise the product sales – to the uneducated.
All well-made models must have easily reachable nose! In the models mentioned above, the nose cover is profiled. With oval faceplate models, the body underside has two finger grooves which allow you to pinch your nose closed. This is an essential feature used in pressure equalizing process called "Valsalva's Maneuver". It will be discussed in detail later on, within the part describing actual diving below the surface. For now, let's just say that masks with oval faceplates are gradually leaving the market altogether, since these are in many ways inferior, compared to the newer models.
The mask should fit your face well, and here is how to test it right there in the store:
Put the mask to your face without using the headstrap. Now frown a bit before pressing the mask lightly to contact the skin. The frowning ensures that the mask pressure does not stretch the skin around your eyes. This is known among divers as "making the mask face". Be careful to remove all hair, beard or moustache from around and under the sealing line. Inhale lightly through your nose to evacuate some air from the mask. The mask should stick to your face without the headstrap support. Experiment with sizes and models until you find the one which fits your face the best.
Snorkel
A snorkel is a simple tube which repositions your breathing air intake point, so you do not have to raise your head out of the water for every breath. The most important features of good snorkels are the construction simplicity and minimum airflow resistance.
The simplest snorkels consist of a tube, a mouthpiece, and some kind of tie that attaches the snorkel to the outside of your mask headstrap. Everything else you might find on the snorkel is just mercantilistic nonsense, and does not serve any basic purpose. The snorkel should have a large inside diameter of at least 2cm. This diameter should actually be equal or greater than that of your windpipe, so as to create as little airflow resistance as possible, even with heavy breathing. It should absolutely have no corrugated connection elements. It takes more effort to clear such a snorkel of water. The tube has to be smooth, open and unobstructed, with no add-on ideas like "water dispersers", "wave guards" and the like. The things are useless, and should be either avoided or immediately removed. For the same reasons, don't use snorkels with any kind of self-closing mechanism. Made by people who do not understand much about diving, these just make for great ads. Such gimmicks use a kind of flotation-operated element which won't work in all positions.
Water should freely flood the snorkel at every dive. If you dive down with the air inside the snorkel, it tries to float back to the surface, tugging annoyingly at your mouth and mask. This needlessly takes some of your energy and attention. Anyway, as you come back to the surface, the lungful of used air will be expelled first, blowing the snorkel clear before the next breath is taken.
Since you breathe in and out through the same tube, you will inevitably inhale a part of previously exhaled air. To keep this portion as low as possible, it is recommended that the snorkel is kept short. Almost all snorkels are sold initially longer than necessary. Normally you'll need to keep the top opening maybe 3 to 5 cm above your head, and energy-conscious divers will usually cut off the top 5 or so centimeters. In time, you learn to keep your head in such way that no water splashes into the tube, or rarely, even when swimming through the waves. By shortening a snorkel to economical length, you will re-breathe a minimum of expelled air, there will be less airflow resistance, and this helps you retain some swimming energy. I keep repeating this, as the saving of energy in water is important.
Fins
The fins let you efficiently move in the water without using your arms for swimming. These also make it possible to mantain your position, so you can use your hands to photograph, or hold on to some objects.
Fins are important, and your choice will depend upon several aspects. There are several things you should carefully consider prior to actual shopping for fins:
- water temperature (where and when do you plan to swim / snorkel),
- water conditions (waves, streaming),
- kind of entering / exiting surroundings (beach, rock, boat... all?)
- simplicity of putting on and removing the fins (related to the above), and
- length of intended swimming stretches (if predictable).
One type of fins has a fully formed shoe, which is intended to fit your bare feet. This is best for warm waters where you do not expect to wear additional diving (Neoprene rubber) boots or socks, also for a kind of ingress and exit from the water where there are no obstacles like sharp rocks. Walking in fins is always awkward, and many divers using this kind of fins usually prefer to enter and exit water by walking backwards, which is easier. These fins are also more comfortable to wear.
The half-enclosed fin shoes are open at the heel, and those are meant to be worn over neoprene socks, boots, or over simple sneakers. Full-suited divers usually prefer those, since they are diving in cold or polluted environment, and thus need additional body protection. These fins are fastened to the feet by straps over the heels. When worn over the sneakers, these are excellent for donning and doffing in the water, especially where one has to walk over sharp rocks. These are very popular with SCUBA divers carrying their heavy air tanks over all kinds of ground. Consider this fin type seriously, bearing in mind that the size will have to fit the footwear you will be using with your fins, as these fins are not designed for barefoot usage.
TIP: higher sneakers which can accomodate thin Neoprene socks might be an all-seasons solution! Note also that any kind of footwear which floats might require some added weight to keep your feet under the surface.
The fin blade considerations should encompass the purpose, size and materials. For underwater photography, it does not make much difference. The blades should thus be large in width, enough to stabilize you in the water, rather than overly long or hard. Such versions retain the large active surface, and offer more maneuverability. Modern fins are made of long-lasting silicone compound that remains impervious to numerous contacts with salt water, sunscreen lotions, motor oil and long exposures to sun. No fin material is abrasion-resistant; the fins are easily damaged, so note the things to avoid. If carefully used in all situations, it will be hard to find "bad" fins nowadays.
Pay attention to the foot-enclosing parts; proper size, solidity, and production / finishing quality. When you put the fins on and off your feet, you should not struggle with overly small size and overstretch the material. In case of open-heel type fins, see if you can obtain spare heel straps, lest one of those should break and ruin your plans for the day. Or worse, holidays. Though, the heel straps can always be improvised from, say, an old inner tube, or some bag strap... A need has been known to promote inventiveness!
Fins are usually left and right symmetrical, and their parts are interchangeable. There are some models where the blade comes off the shoe part (to facilitate walking), but the connecting parts are the weak point, and uselessly complicate things, so it would be simpler (meaning: better) if the fins are integral.
The size of the blades will not matter much, since photographers do not compete in swimming. By the way, you should not consider any competition-type fins for use in underwater photography. Such fins are made for speed and straight stretches of clear water. Easily damaged when walked in, and cumbersome in maneuvering, these are totally impractical for our purposes.
Pick the blade size which will not overly exert your energy. Large, hard blades offer more stability, but also require more energy. If one is not a trained swimmer / diver, this may cause muscle cramps. Cramps are very unpleasant in water, so pick some middle-sized blades and make sure you are comfortable wearing those. Comfort in water is an important consideration.
Some good fin materials nowadays (such as Tecralene) will float in saltwater and sink in freshwater. This makes them weight-neutral. It is advisable to buy such fins from the diving store, where they understand something about their ware. Longtime divers can offer proper answers to some of your questions, and help you pick the best model for your use.
One should avoid buying one's swimming tackle from just about any general store, regardless of intriguingly low prices! A good attitude toward diving gear is to be prepared to pay more for the quality. After all, you won't be buying those highly personal things every year! The proper usage also depends on your being familiar with your gear, so it pays to invest more and use it for a longer time.
*
The next part should give you some information on how to use your snorkeling equipment.