Introduction To Underwater Photography – How to Snorkel & Take Photos
(part 3 of 3)
Hi!
In the first two parts we have discussed the basic snorkeling equipment, and how to manipulate it. This part should explain the apnea (breath-held) diving as an integral part of snorkeling, and also the basics of underwater camera usage.
Snorkeling
The name comes, of course, from the most prominent piece of equipment used in this kind of swimming and diving. The snorkel, your breathing tube, relocates the air intake from the face to a dry spot above and behind your head. That way, you can breathe with the face submerged - and this is the key feature to underwater observing and photographing.
Snorkels are used by SCUBA divers too, as they spend some time on the surface before and after the dive. It is regarded as a safety device, since it allows you to breathe while in natural floating position.
When you begin your snorkeling swim, it is assumed that all the previous preparations and checkups are done, and everything works as it should. Your body is fully supported by water, and every movement of your fins propels you over the area which we'll hence call the aquatory. You see the watery space around and below, and enjoy the ability to breathe as if you were strolling on dry land.
To swim along the coast for the first time, pick a time on a clear day when the light best penetrates the water, and thus ensures maximum visibility. Follow the line of equal depth. Let it be as deep as the length of your arm, and perhaps not deeper than your chest height. That way you will be able to stand on the bottom should there be any need for some adjustment.
Try to pick the kind of weather when the surface is calm, and a place where there are no water currents. As a rule of thumb, do not enter streaming water (also strong currents) until you are quite positive that your swimming strength and experience allow you to safely do it. SAFETY FIRST is not an empty phrase!
If possible, have someone watch over you from the shore. If there is any need for assistance, you will want to be able to get it, and from someone whose abilities you can trust.
NOTE: Please never go snorkeling in the dark. Never mind the headlamp or flashlight. The list of latent trouble and dangers is too extensive to describe here, so trust me with this. Night diving (including the snorkeling!) surely is fascinating, apnea or SCUBA, but a certain specialised knowlege with a lot of daytime experience are unavoidable and irreplaceable pre-requisites, and that is not the part of this very basic Introduction.
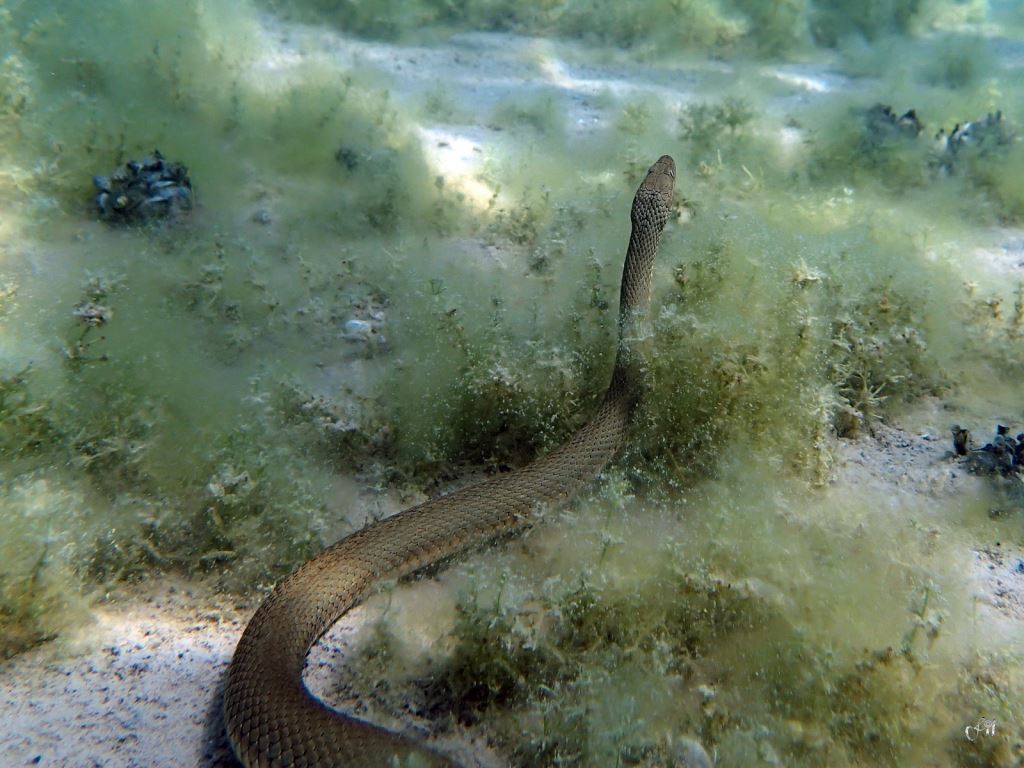
Notice the inclination of the aquatory bottom. It will be dropping toward greater depths on one side, while rising to the shallows on the other. This is the first orientation element you will use to return to your starting point. You notice the sunrays knitting their hypnotic net in the water and over the bottom. You notice the curiously formed organisms, the way the bottom rock is overgrown in algae, the clusters of shells, the gliding paths of fishes trying to hide from your eyes, and all the other fantastic things which will make your visits to the waterworld exciting every time. You will wonder at the fact that, in the seas, only algae and sea grasses belong to the flora; all else is animal, whatever the appearance.
Look at the living variety without trying to touch anything, especially if your aquatory is marine. Some living beings there can defend themselves in surprisingly efficient manner, regardless of their size. Besides, all water-borne aquatic life is easily damaged, so be content to enjoy it all by sight only.
Control your ambient. Look at both sides regularly, occasionally behind you. Look at the zone just below the surface, as well as at the bottom. You will notice how many things look different when seen from alternate directions. Try to remember prominent features while you swim. Note this large, curiously shaped rock, that cluster of high grass, or a crack in the bottom. Make a habit of it. You will use these spots to check your direction and progress, also as waypoints for your return.
Depending upon the circumstances, plan the whole swim. Even on a hot, sunny day, remember that the time of exposure should be moderate. Although the water will make you feel cool and fresh, the influence of the sun through the shallow water will be the same, and you wouldn't want to risk sunstroke. Ditto cold water: if you swim until you actually feel the cold, remember that you'll have to swim the same distance back. Thus, plan well: halve the distance - and remain safe and comfortable!
Apnea (breath-held) Diving
Pressure:
Water supports human body, but it also exerts pressure on the body parts which contain air.
Our air is a mixture of gases: 78% of the atmospheric air is Nitrogen, Oxygen makes 21%, and the remaining 1% is composed of water vapor and traces of rare gases (Argon, Xenon, etc). All gases are compressible, which means the air will change its volume according to the pressure, also the pressure according to volume.
Pump more air in a balloon, and it will grow. In the same way, put a blown-up balloon in an area of larger pressure (such as underwater) and the outside pressure will shrink the balloon exactly so much as to make the air pressure inside to be equal to the ambiental. When the balance is achieved, the deformation ceases.
Liquid is not compressible, well, it is actually, but for all practical purposes it is too negligible to matter. But that is why its weight and density exerts pressure to gas-filled volumes. When you dive under the surface, the body parts containing air will be compressed, and this pressure will have to be neutralized (or: equalized to the ambiental pressure) before any damage occurs.
Lungs, oral / nasal and facial & frontal sinus cavities are affected by the change in ambiental pressure. The inner ear is one of such spaces too, and the most acute problems in diving first make themselves noticeable between the inner and the outer ear, e.g. via the sensitive eardrums.
The body parts like arms and legs are liquid-filled, have no internal air volumes, and the ambiental pressure cancels itself out. But the air-filled body parts require our special attention – and that's the most vital part of learning how to dive! Whether in apnea or using any among the existing breathing systems, the physics of gas and liquid are equal and all-important in all kinds of diving.
Mask:
When you dive down, the first notice of the raising pressure manifests itself on your ears and the mask. The water tries to pressurize the inner gas volume by pushing these inwards. Solving the mask squeeze is easy, since it encloses your nose. Simply add some air into the mask through your nose. When the inner and outer pressures become even, the mask returns to its original position. Regardless of the depth, and whether in apnea or SCUBA diving, the procedure is the same. This is one of the simplest routines any diver has to acquire. The trick is to do it immediately as it happens, and not to wait.
By the way, this also explains why you should never dive with swimming goggles! These are not connected to your breathing system, and so you can not equalize the pressure difference in the goggles. Water pressure will push the goggles in, and also suck the eyes into the goggle air volume, attempting to equalize the inner pressure with the ambiental. This can lead to serious eye damage. So beware – and warn the others! Many people are not aware of this, especially children, so they'll simply buy the goggles and dive, unaware of the danger to their eyesight, and the fact that such damage can be irreversible.
Eardrums:
As the outer water pressure rises, the eardrums bend inwards, since the area behind the eardrums is air-filled, and thus compressible. This will first cause a feeling of pressure, then pain. If that pressure from the outside is not relieved, the prolonged exposure can stretch and damage the eardrums, causing loss of hearing. Not only an acute danger, deafness can happen from prolonged wrong practice, even if it takes years to develop. This is fairly common with the uneducated, who think ear pain simply belongs with diving.
In extreme situations the water may break through the eardrum, entering the middle ear where our center of balance resides. Aside of intense pain which can cause loss of consciousness, it is likely that the cold water ingress utterly destroys your sense of orientation. This in turn opens an extremely dangerous scenario, and let's just say the consequences can be anywhere from serious to terminally tragic.
The way to avoid all the ugly things which your eardrum can cause, there is a procedure which has to be read, learned, practiced, and above all understood well before it is put into practice. The pressure equalizing is the most important part of this minimal Introduction. At least, I'd like you to look at it that way.
The most logical way of reducing the pressure and its effects on your eardrums is somewhat similar to the process of equalizing the mask pressure against your face. If you pump some air to the inner side of the eardrum cavity, the pressures on both sides of the eardrums become equal, and the eardrum returns to its normal state. But how do you pump the air into your ears?
Luckily, Mother Nature provided the body with the means to achieve that.
That's also why your mask has a rubber nose! All masks have some way enabling you to squeeze your nostrils and block the air in there. When you pinch your nostrils closed and blow in, the pressure in your nasal / oral cavity will raise. This will force some air through two tiny channels which connect the oral cavity with the inner ear. These passages are called Eustachian tubes, and their purpose is just that: maintaining equal air pressure on both eardrum sides to keep the eardrums in their natural state throughout all the atmospheric pressure changes. Such changes occur normally every day, like when we climb the mountains, ride an airplane, or simply when the climate causes it.
The Eustachian tube openings on the oral sides are normally closed flat, but they open in short impulses, which is aided by tiny muscles. This happens every time we chew, swallow, yawn, or when we move the lower jaw forward. To a trained diver, even simulating these movements causes those tiny muscles to operate. Often used in greater depths, it is sufficient to move your lower jaw forward to open the E-tubes and "fine-tune" the pressure on both sides of the eardrums. It works fine with SCUBA and similar breathing gear which automatically maintains the pressure of the breathing gases equal to the outer, ambiental pressure. So the compressible body cavities are always kept at the ambiental pressure, regardless of the working depths.
So when you blow into your closed nostrils, the air forces itself through the Eustachian tubes, enters the middle ear, and neutralizes the pressure of the water which is bending the eardrums inwards. The name of the procedure is "Valsalva Maneuver" (look it up!), and its discovery has made it possible for people to reach deep down into the World's waters and oceans. The maneuver is one and the same for the snorkelers, recreational and deep divers, and there is no diving whatsoever without it, save some special cases and sorts of equipment which is way outside of our purposes here.
You can try this maneuver right now.
Pinch your nose closed and blow into it. You should hear some squealing sound in each ear, followed by a slight "pop" and feeling of "fullnes" in your ears. This effect should occur simultaneously in both ears, or with a slight delay on one side. If you have a cold or some other temporary problem which makes it difficult for Eustachian tubes to open, or if the effect appears in one ear only, do not force it. It will be easier when your health returns to normal.
To return the normal feeling to your ears, just swallow once or twice. It will trigger the muscles of the Eustachian tubes open and the pressure will be normalized.
As we dive down from the surface, the outer pressure will mount. At -10 meters it will rise by 1 Bar, or one kilogram per square centimeter of the body surface. If we think of absolute air pressure at sea level as 1, then at 10 meters depth, the pressure will be twice that (2 Bar = 2kg/sqcm). At a depth of 20 meters, the pressure will be 3 Bar, and so on. This will tend to progressively reduce all our air-filled body part volumes in order to have them at the ambiental pressure. For example, if you took a 10-liter balloon to a depth of ten meters, it will be squeezed to half its initial volume (e.g. 5 liters), in order to have its internal pressure equal to the ambiental 2 Bar pressure. Taking it to -20 meters or 3 Bar pressure will further halve its remaining air volume (to 2.5 liters). And so on.
If we used the SCUBA equipment, we wouldn't feel the ambiental pressure at all, since the breathing regulator delivers air (or any other breathing gas mixture) to our pneumatic system at the exact ambiental pressure. But we are diving in apnea, holding our breath. This means we will have only a lungful of air taken at the surface level.
Of course, our fluid-filled body parts won't feel the pressure at all, since the fluid isn't compressible.
Our chest structure and all the bone-enclosed air-filled cavities will resist the mounting pressure on the outside...
... so the first warnings will come from the eardrums, our weakest and most sensitive spots exposed to the outer pressure.
Should we then plug our ears closed, to reduce the pressure? Don't even think of it! Never plug your ears when diving!
It brings about even more dangerous physics. The ears must remain open to the water. It is the safe way, since we need to feel the pressure change, and react to it properly.
NOTE: There are various ear-plugging devices advertised as an aid in diving. If you must keep the water away from the eardrums, consult your doctor first. Your doctor should understand barotraumatics, of course. There are some new types of earplugging devices developed lately, which are flexible and able to transfer the pressure to the eardrums while keeping cold and/or polluted water out. Such earplug types are prescription-only, as they're made to measure (everyone has different sound channel configuration). Me, I'd rather steer clear of all kinds of earplugs. When I'm diving it is extremely important to feel the pressure, to be able to properly equalize it. I also want to hear the underwater sounds unchanged.
To open the Eustachian tubes and equalize, it is important to perform the mentioned Valsalva's maneuver or other described actions timely. Do it as soon as the pressure on the eardrums is felt! If you wait until there is pain, it will be difficult, as the Eustachian tubes will then require much more force to open, and sometimes it won't work. The proper thing to do is to try again at reduced depth. Since such depths are different for different people, remember to act in time, and of course, as you descend repeat the same procedure whenever you feel it necessary.
Returning toward the surface (the area of lesser pressure), the surplus air that you have added to your middle ear cavities will exit via Eustachian tubes naturally, and there is nothing extra to do about it.
Remember: Do not ever dive to your pain level before attempting to equalize ear pressure! Alone the stretching of the eardrums is able to chronically or acutely affect your hearing. So, disregard any advice related to some suggested default depths for equalizing ear pressure. There is no such thing. Your ears are your own, and only you can feel them and undertake timely procedures.
I have seen some "literature" suggesting that pressure equalization be done first at two meters, then at five, and so on... This is simply irresponsible. Every body is differently built, trained and mantained, so there can not be any fixed depth-related "rules"! There are only your own sensors in your own body. These are the most trustworthy and relevant information source you have - throughout your life!
Another caveat; don't dive if you have any inflamatory processes in the ear or the nasal / oral cavity. Be sure to also check that your sinuses are not clogged, and that there is no problem with your teeth! Any air-filled cavity can give you trouble in activities related to changeable environmental pressure, even in flight, let alone diving! The entire pneumatic tract of the body has to be sane and normal for safe and enjoyable diving. If you have a cold, if your nose runs, if you feel any among the symptoms related to the body parts mentioned, simply don't dive. If you want to enjoy water, there is plenty of macro-themes for your photography to be found just by floating and swimming in the shallows. You can always go deeper another time.
As mentioned before, this is the most vital part of learning how to dive. By all means, get hold of every single piece of info you can find, learn whatever can be learned, but be cautious and always cross-check your data. There is a lot of irresponsibly placed information around, usually motivated by some devil-may-care mercantile attempts... so don't take anything for granted at a first glance. If you feel you need more help with any dive-related theme, feel free to ask. Don't forget that what you have just read is by far not everything to be learned. This is merely a basic introduction to one complex activity which appears to be deceivingly simple.
Diving Down:
OK, the day is nice and sunny, the water clear and calm. You are floating face-down over an interesting spot of the bottom and want to see it close-up. The depth is about three meters or so, but it looks much closer. How much closer? By about 1/4th. This is the enlargement factor in water optics. Whatever we see in the water as 3 will be actually measured as 4. Your brain learns quickly how to deal with this, and since your camera has a flat port, same as your mask, the bonus is that your camera will be tricked by exactly the same amount as your eyes – thus as regards the real and apparent size or distance, what you see is what you get!
The notable exceptions occur with some water-specialized lenses which have corrected ports. These "see" the exact distances, and have to be either manually focussed with that correction in mind, or left to cope using their autofocus system, which does it right. Never mind, let's go down and visit.
Lying flat on the surface, take two or three deep breaths: it's called "hyperventilation". It charges you with some more oxygen, and vents the bad air out of the system. Deep and slow does it.
Take care not to overdo it, though! Over-charging oxygen by hyperventilation can disturb your carbon dioxide level, and you need that to "prod" your next breath! The right sense would be to "feel refreshed", nothing more.
Taking a deep breath, simply bend down in the waist to form a 90-degree angle with your legs. Move your arms forward to help push the body in that position. Then bring the legs up, as if you want to stand on your head. With your arms in front and your legs in the air, wait for the weight of the legs and fins to push you down. Bring your arms back in a breast-swimming stroke. Your fins sink under the surface, and you dive down nicely and elegantly with practically no energy spent on that.
Start moving the fins when these get under the surface, not before. No need to rush and splash; use the inertia of the initial sinking, and simply proceed. Swimming down, do not use your arms. The fins will do a better job alone. Keep the arms alongside your body where they arrived at the end of the initial stroke.
Since you'll probably have a camera in one hand, use the other to squeeze your mask nose and equalize the ear pressure as described. Add some air into the mask to equalize it too. And you're already there. Take a second or two and look around you. The new perspective may show some other theme for a photo.
Take care to execute all of the movements smoothly and economically. Do not jerk the body around. Remember how meagre the effects of double the invested energy are! You're in the water – do like fish do.
Approach your object, brake your movement by spreading your legs and turning the fins outwards to stop your progress. Slowly position the camera, check frame in the monitor, and squeeze the shutter.
Congratulations!
Move your arms down while arching your back, and look toward the surface. One more in the bag – or on the memory card. You're ready to come up.
Surfacing:
Assuming the arched-up position sends you towards surface by a single move from your flippers. Alternatively, you might turn around your length by moving one fin forward and the other backward. This will quickly rotate you and you'll be looking up. Swim slowly by your legs only, using mostly your buoyancy to lift you up toward the surface.
If you hear any boats, or generally if the water offers no great visibility, rotate while ascending, and break the surface face-first. This also brings your snorkel into end-down position, and when it clears the water it will pour itself dry, so you won't have to blow hard to expel the water. Remember, saving your swimming energy is important, and this snorkel emptying maneuver saves you a bit more.
By the way, just being in the water urges your body to convert the energy to internal heating, and although you won't notice it at first, cool water alone can tire you quite efficiently. If you accept the energy-saving approach from the beginning, you will avoid exhaustion, be able to prolong your snorkeling, and generally be more productive in your primary goal – underwater photography.
In SCUBA diving or in underwater spearhunt, even completely suited-up divers often notice how exhausted they are first when they have to climb into the boat! This fact is pretty well masked by the body and suit buoyancy, but the realization comes swiftly when one has to make an additional muscular effort. So it is useful to be aware of energy saving, right up front.
Taking Underwater Photos
If water is not very clear, it is obvious that the photos will not be very attractive. At times, and for various reasons, water carries a lot of suspended matter which limits viewing and shooting distances.
If you are keen to take some pics regardless, the best kind of photos will come from macro mode. The less water between the lens and your subject, the better. Actually, this attitude works with all kinds of underwater photography, since water is very different photographing medium from the air.
Harness your optimism right away and forget about the zoom. Many underwater-capable cameras offer some 3-5 x zoom, but you will quickly discover that in water, the zoomed-out lenses simply collect more sediment and other suspended matter, much like the long lenses on dry land compress air humidity over the distance, making the colors flat and bluish. The best images will be achieved at wide-angle setting, and also in macro mode. Zoom is thus best reserved for dry-land use.
Wide-angle shots enframe much space, and so automatically make you come nearer to your object. This in turn reduces the layer of water in between, lessening the influence of aforesaid suspended matter. Same with macro: distances are minimal, and sometimes only your theme hints at the fact that it was photographed in the water. Both kinds of photos are best taken in shallow water, as the light there will be strongest, and as regards the spectrum, most complete.
The sunlight hitting the water behaves interestingly, very dependent upon surface conditions. One part of it will simply be reflected back. This is related to the lighting angle. At, say, 60 degrees, almost 80% of the light will be reflected away, and with sunlight, this low angle happens after sunrise and before sunset. It will also depend somewhat on your location, but generally, the best snorkeling photo hours are when the Sun is high, and the light penetrates water the deepest; between 10 or 11 AM and 3 or 4 PM. Underwater, sunsets and sunrises are pretty much out.
From what of the light has penetrated the waters, the red part of the spectre will be filtered out after the first one meter of depth. Warm colors will gradually disappear with the depth, until at -15 meters only blue-green hues will remain. Makes you think of the flash? Read on.
There is a thing divers call "a blue barrier". This refers to the ability of water to filter out the light between your lightsource and your object, and quite regardless of its strength. In the sea, this barrier resides at about five meters, and I mean the clearest possible conditions. If your aquatory is murky, or if there is a lot of underground sweetwater seeping into the brine, the conditions will be even worse. And there are many reasons for water not to be clear nowadays, various human activities included.
So think about your flash as an emergency light more than anything useful. If you're using an amphibian Point & Shoot model, and your only flash unit is built into the camera, clean forget about any usable lighting over one (1) meter distances. Note that the light has to go to your object, and then reflect back into the camera, which is actually double the shooting distance. Also note that, since the flash is situated very near to the lens, every suspended particle will be lighted head-on, and thus 100% visible, even if you did not notice it while taking pictures. Every particle will be lighted from the front, and appear like a tiny full Moon.
If you invest in a camera housing, it is best to use an external flash unit. These are activated either via synchronizing cable, or by means of a slave sensor which detects the on-camera flash and triggers the remote. Some external flash units with slave triggering can be used with point & shoot cameras as well, for only the casings will have the classic sync wire contacts. In all cases, the camera housing / camera body and the flash unit arm are fastened to the accessory rail, and the arm controls the distance and the angle of the external flash.
This way you can light your object from various angles, creating shadows and some sense of space depth in your photos. The visual disturbance of suspended particles in water can also be partially reduced when lighted at an angle. If the external flash is triggered by the camera's primary, you'll have to determine the intensity of light from both sources, but it will greatly widen the possibilities. Thus, when picking a camera for your needs, consider the adding of an external source as an useful option.
Many things can be made in DIY fashion. Sometimes the expensive flash units can be replaced by strong flashlight(s) mounted on appropriate carrying arms. Think halogene or xenon lightsources, the wider the output, the better. LEDs, even the strong ones, will be good for shorter distances, such as macro photos.
Lightsources which get their strength by output focussing are less good there, since you need a wide enough light cone to cover the whole of your lens field of view, possibly even wider (vignetting!). Also, the constant output lightsource may be used with video, ever since this has become a common feature with almost all of today's cameras. If you check what's available on the diving market, you might find some flashlights which come a lot cheaper than many an external flash unit. All you need to do is add some kind of connecting point to be able to fasten such a light to any solid positioning arm (which can also be easily made at home). Remember to use only non-corrosive materials, and you'll be happy with such a system for a long time.
Enjoying Your Photography
I'm lucky to live by the lake which is unbelievably clear and rich in thematical variety. But for the greater part of my life I have been diving and taking photos in the sea, and cleaning the equipment after every dive became an inevitable ritual. So best accept it right away, it will save you a lot of grief.
All the various camera systems from those days till now require a thorough wash in fresh water after every immersion in the brine. That's what makes me happy about my Lake: my gear gets washed while it is used! But seawater (and let's not forget the polluted water) absolutely requires complete removal of salt, biological matter and mud or sand particles. Otherwise the crystallization will cause mechanical problems, interfere with proper sealing, and in time, create the circumstances which will lead to damage and failure of any device. And I mean "will lead", not "might lead"...
So, coming out of seawater and/or any impure water environment, wash your gear thoroughly. Don't use any kind of detergent, those might affect materials used with some camera sealing elements. Read carefully the manufacturer's recommendations re mantaining your device sealing system! Some sealing systems may stand the equally distributed water pressure, but not the shower, since strong jets of water exert uneven pressures which can lift a gasket and enter the casing.
Wipe off whatever water has remained on the outside, and dry the unopened camera in the shade before opening any closures or hatches. If you used the camera in seawater and can't wash it out right away while it is still wet and the salt has not had a chance to crystallize, it is better to wrap it in a wet towel so that it does not dry before you get it into the freshwater. The goal here is to prevent salt from crystallizing, since it will then be more difficult to remove. If your camera has dried unwashed, leave it in shaded freshwater bath for one hour at least before attempting to wash it clean.
By the way, don't forget to wash out your mask, fins and snorkel too! Sometimes the ads will proudly state how some materials are impervious to chemical influence, but I have not yet seen it in real life.
Let all your gear dry in the shade. Generally, get used to keep your gear in the shade at all times, but do take extra care with all air and watertight kinds of casings. These get very hot in the sun, and this is not good for electronics, batteries and plastic. Sun-heated cameras, flash units etc. have the air inside expanded, and with some types of sealings the heated, over-pressurised air will force its way out from under the seal. Now if you cool the camera by immersing it in the water, the inside air will contract, creating a partial vacuum. If there was any impurity in the sealing area, that's where the water will be sucked in before the strong outer pressure seals the spot more solidly. Besides, the sudden cooling will probably cause inner condensation, fogging the inside of the camera port and the monitor.
By the way, here is something to learn about how to keep your camera / casing dry, so as to avoid internal fogging!
If you have to change the memory card or the battery between dives, take care to dry off the camera as well as you can. Open the card / battery hatch so that it points downward. If there is any water around the seal, it won't seep inside the casing. Replace what is needed, and carefully close the hatch while holding the camera in the same position. Never snap the hatch closed; do it slowly and thoroughly, always checking for possible hair, sand, lint or other dirt in the closing and sealing area.
However interested in your photo results, refrain from opening the hatch to access the contact port until you have performed the complete washing and drying ritual as described. It takes more time, but that's how the underwater equipment is used, and there is no way to circumvent it without risking damage to your gear. Do it diligently, using care and concentration, and your equipment will serve you for a long time. Don't take shortcuts around that routine! Remember that water is patient, and waits for you to make an error. It's all the same with snorkeling, diving and underwater photographing: the proper way with water is to show respect.
Water has been known to return that respect, and give you many gifts of enjoyment for your diligence.
Not to forget, I have one dire warning for all of you who plan to follow this Intro. Underwater Photography is seriously addictive!
So be warned: once you begin, you get hooked for life!
Enjoy!

(Bottom growth, Lake Ohrid, Macedonia, -0.5 meters)
(Want to go back to Part 1 or Part 2? Use these links!)